Seated poses on the floor look simple and are among the hardest to draw convincingly. The body folds into overlapping shapes, the legs foreshorten, and the figure has to sit on a surface that is itself in perspective. This set collects ten photos of people sitting or kneeling on the floor, indoors and outdoors, with notes on what each one is good for.
What to look for in a seated pose
- The base of support. Find every point where the body touches the floor: the hips, a hand, the side of a leg, the feet. Together they show where the weight sits.
- The spine. Without a backrest, the back usually curves. Against a wall or a chair, it straightens. Draw the spine as one line before adding anything else.
- Foreshortening. Legs pointing toward the viewer look much shorter than they are. Measure them against the head instead of drawing what you expect a leg to look like.
- The floor plane. The floor is a surface in perspective. Sketching it first, even as a rough shape, keeps the figure from floating.
The reference set
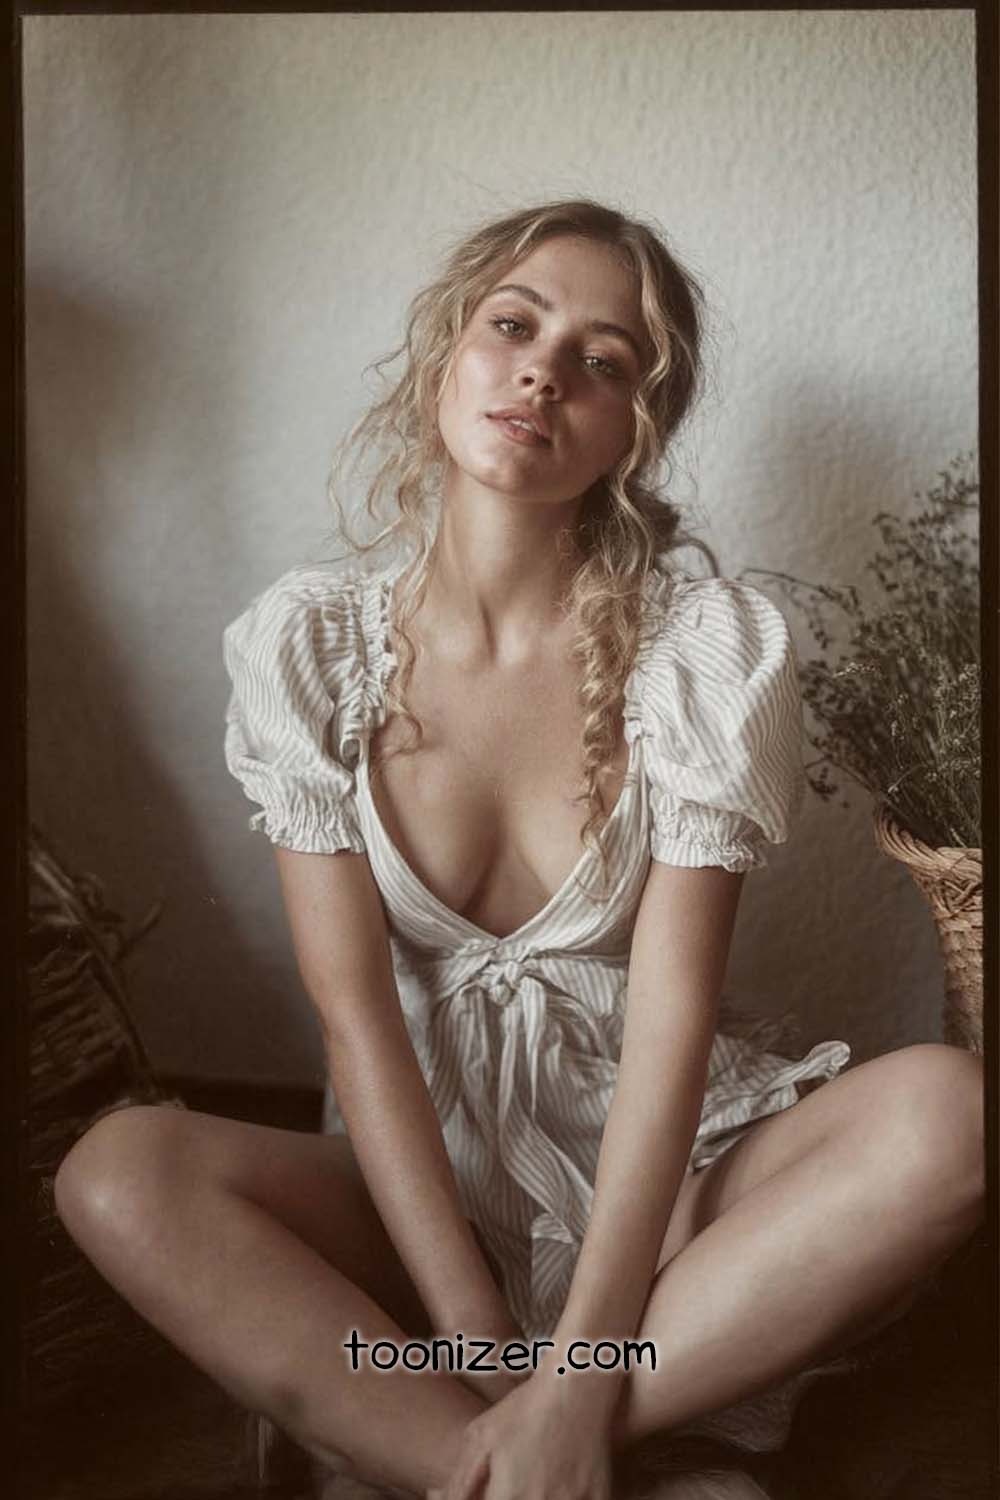
1. Against a wall. The wall takes the weight of the back, so the spine stays fairly straight while the head tilts slightly. Notice how the dress drapes over the knees and settles on the floor.
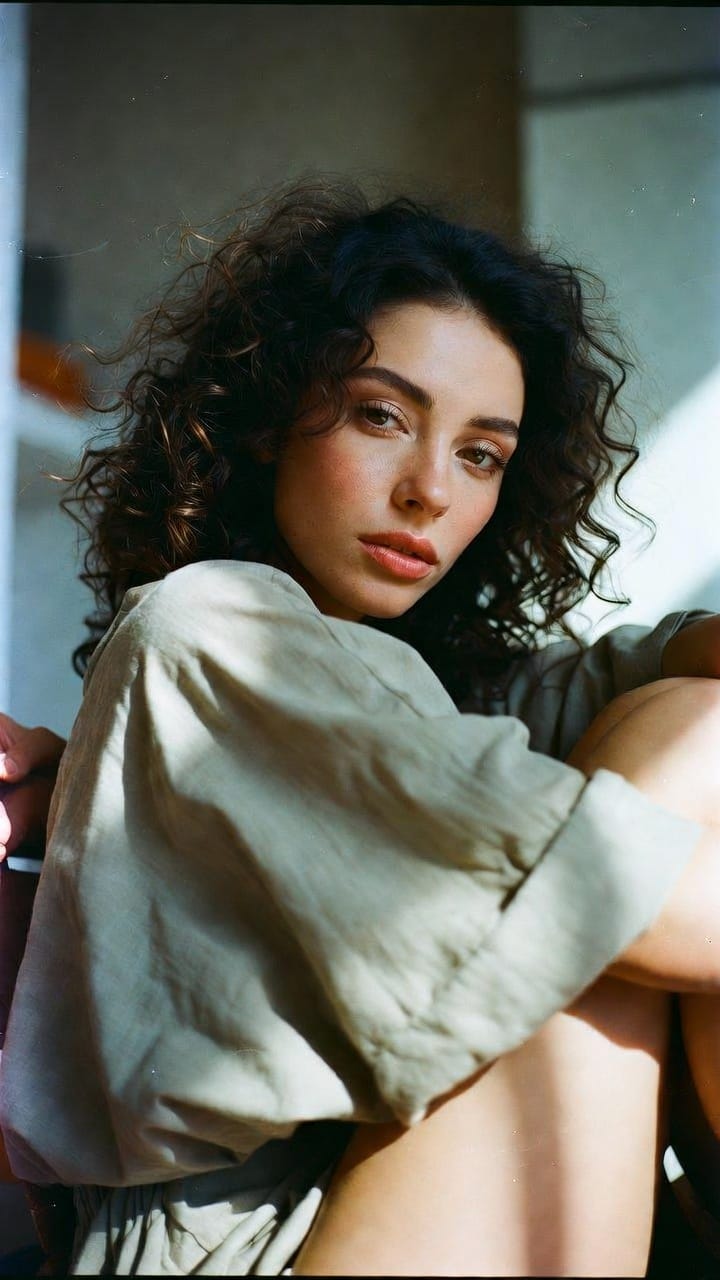
2. Arms around the knees. A compact, closed pose. The shins and forearms form overlapping near-vertical lines that are easy to misjudge, so check their length against the head.
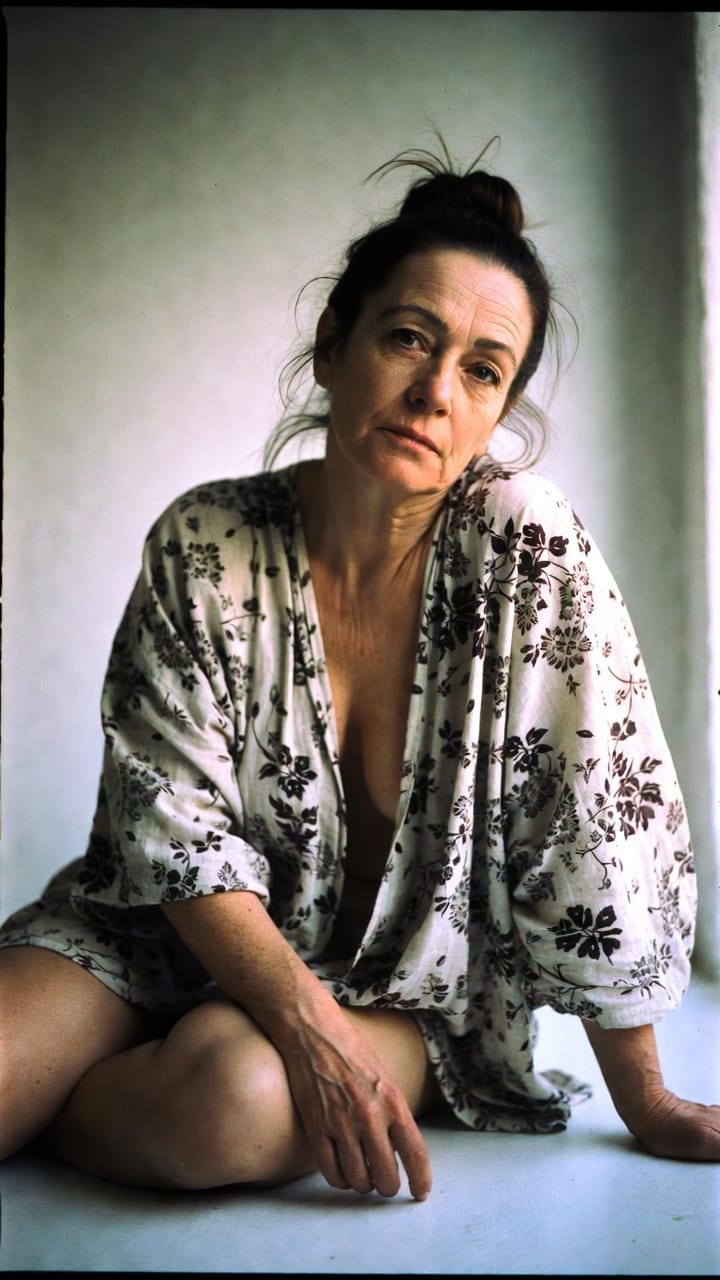
3. One hand on the floor. The supporting arm takes part of the weight and tilts the shoulders. Follow the line from the hand through the elbow up to the shoulder.
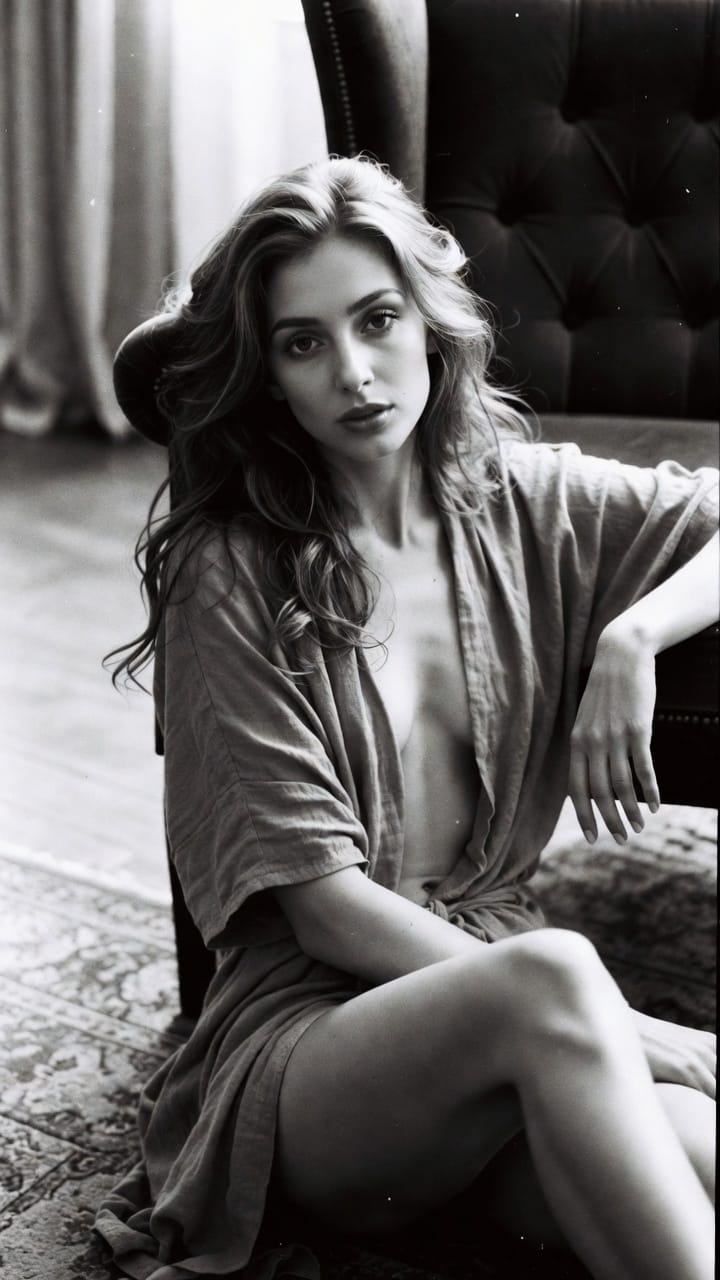
4. Leaning on a chair, in black and white. Without colour, the pose reads only through light and dark. A good study for simplifying a seated figure into a few value shapes.

5. Leaning back on the hands. The arms become two supports behind the body, and the crossed legs point toward the camera. Expect strong foreshortening in the shins and feet.

6. Side light on a bedroom floor. Light from one side separates the planes of the face and body. Notice how the shadow side helps describe the bent legs.

7. Head back, eyes closed. The neck stretches and the jaw lifts, a view of the head that is harder to draw than it looks. The strong warm light makes the shapes easier to read.

8. Outdoors, on uneven ground. On a forest floor the hips and shoulders rarely stay level. Use the tree trunks behind her as vertical guides to check the tilt.

9. Kneeling. Kneeling folds the legs into a short, compact shape. Compare the length of the thighs with the torso, and look at how the weight settles back toward the heels.

10. Focused on the hands. The head bends toward the hands and the shoulders round forward. The patterned fabric is good practice for following folds through a print.
Common mistakes
- A floating figure. Without a contact shadow and a slight flattening where the body meets the floor, a seated figure looks pasted on.
- Legs at full length. Foreshortened legs drawn at their real length make the figure look stretched. Trust the measurement, not the idea of a leg.
- A stiff, straight back. Unless something supports it, the spine curves. A straight line from head to hips usually reads as tense.
- Ignoring the floor. If the floor plane and the figure are drawn from different eye levels, the pose will feel off even when the anatomy is right.
Practice ideas
- Before drawing the figure, sketch the floor as a simple shape in perspective and mark where the hips will sit.
- Block the pelvis as a box for each photo. Most of the pose follows from its angle.
- Do one-minute gesture drawings of all ten, then pick the two that felt hardest and draw them slowly.
For more poses, see Chin on Hand, Same Model, Different Poses and the rest of the Drawing References category.
0 Comments